Most painting guides warn about overloading the roller. Fewer explain that under-loading (sometimes called starving the cover) creates its own set of problems: dry streaks, excess wall pressure, and lap marks from stretching a single load too far. Both mistakes trace to the same misread of what a correctly loaded cover actually looks and feels like.
Getting the load quantity, setup choice, and reload timing right is what separates clean coverage from a troubleshooting session. All three of these decisions are easier to get right at the start than they are to fix mid-wall.
What follows covers all seven steps: tray versus bucket setup, conditioning new covers, the loading sequence, how to confirm the load, reload timing, and a mistake-to-symptom reference. The full stroke technique — W-pattern, wet edge, and dry-pass — is covered separately in the roller technique guide.
Key Takeaways
- A dry roller cover typically needs 5 to 6 passes on the tray slope before paint saturates through to the core. After that, 2 to 3 passes per reload are enough — the initial load always takes longer because dry fibers resist paint until they’ve fully wetted through.
- Correct load: the cover feels noticeably heavier, the nap shows uniform dark saturation, and no paint drips from the ends when lifted horizontally from the slope.
- Reload when the roller starts to drag or produce audible resistance, not at a fixed count of strokes.
What Overloading and Starving a Roller Actually Do
Loading errors divide into two categories, and they produce opposite symptoms. Overloading forces paint past the nap into the roller core, which then back-bleeds onto the wall during application. Starving the cover forces extra wall pressure to compensate, which compresses nap fibers and creates drag marks. Real-world coverage already runs 10 to 15 percent below manufacturer-stated rates under normal conditions, according to BuildCalculate (2025). Loading errors reduce it further.
Overloading happens when the roller spends too long submerged in the paint well. Paint floods the core. On the first stroke, it back-bleeds out in dark, uneven patches. Drips appear on vertical surfaces at the start of each section.
Skipping the slope rollout after dipping produces the same effect. Without the ramp pass, excess paint stays in the nap without distributing evenly. The first stroke deposits far more paint than intended, and the next two or three strokes deposit almost none.
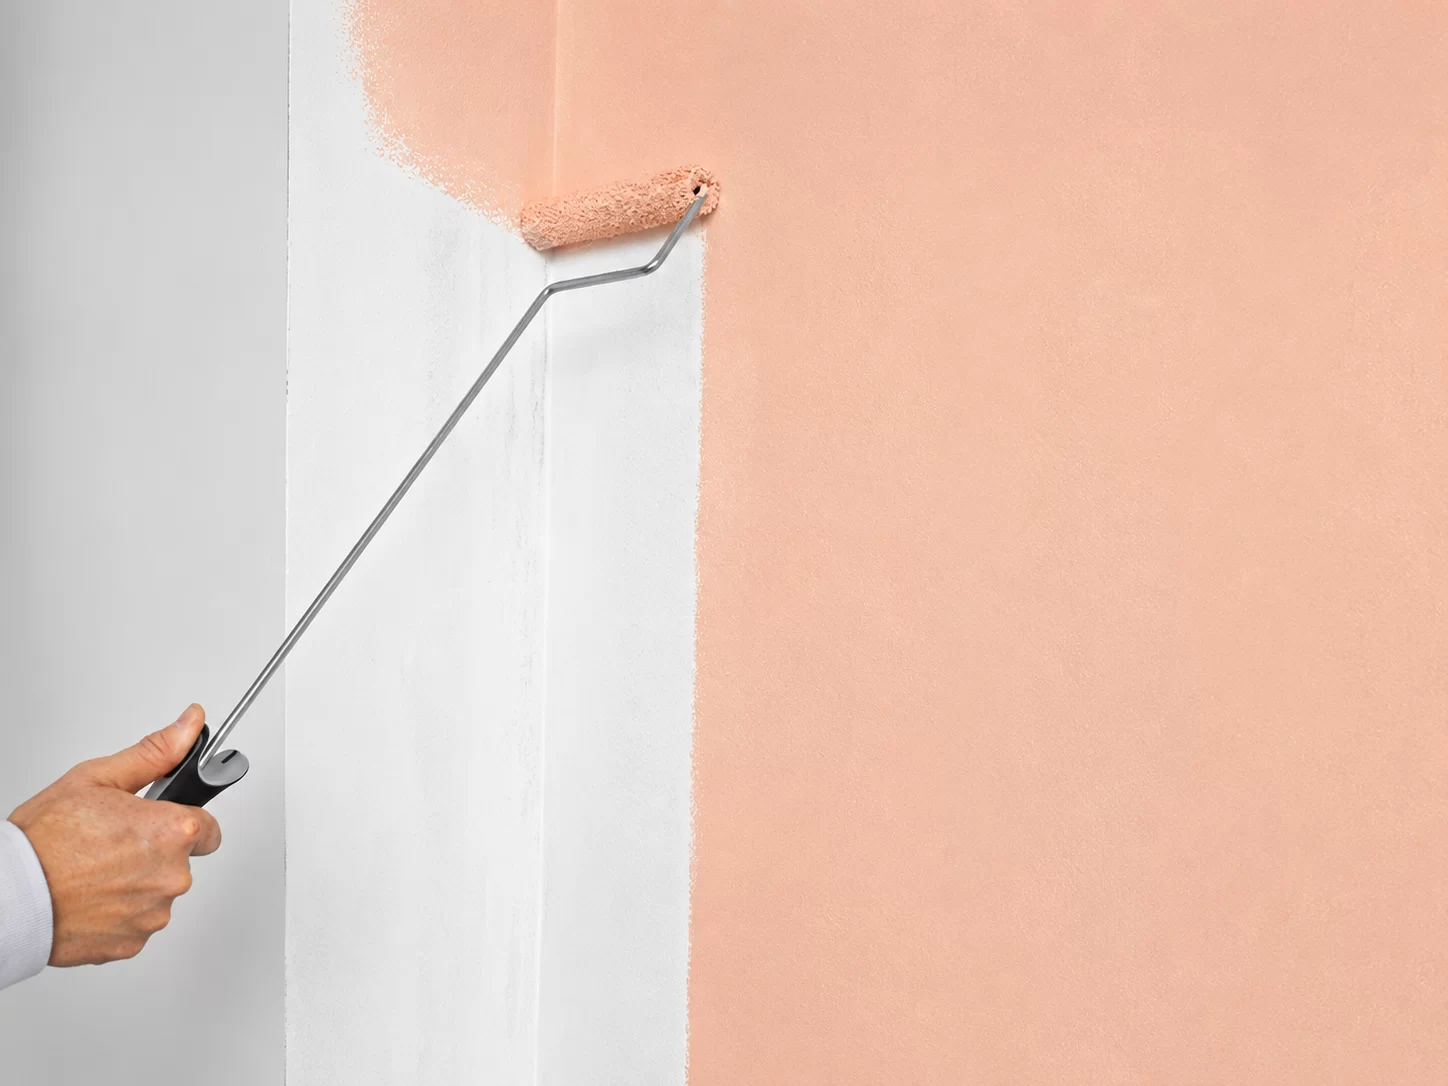
Starving is the less-discussed problem, but it’s as damaging as overloading on large jobs. A starved cover forces the painter to push harder against the wall. That pressure compresses the nap fibers on each pass, which reduces their ability to release paint evenly. The result is a drag sound during the stroke, visible dry streaks across the section width, and lap marks where the wet edge dried before the adjacent strip was completed.
Tray or 5-Gallon Bucket: Which Setup Fits the Job?
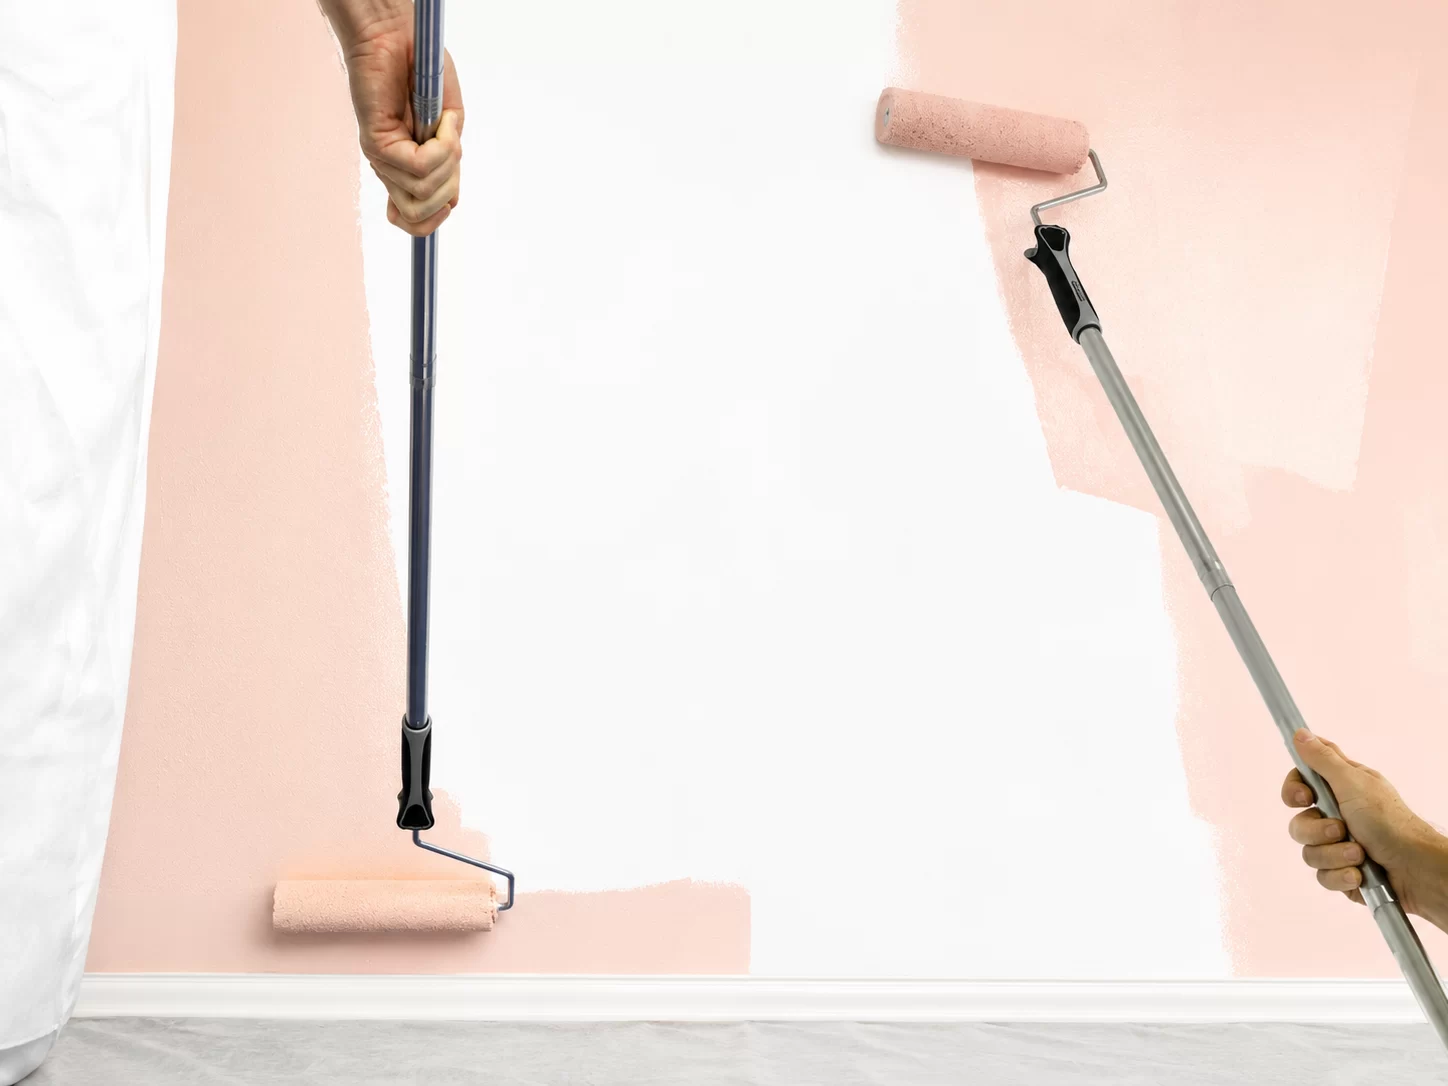
A roller tray handles jobs under 200 square feet efficiently. For larger walls, a 5-gallon bucket with a metal or plastic grid cuts reload trips and is more stable on a ladder. The grid regulates the load the same way a tray slope does, but holds four times the paint volume, which matters on ceilings and commercial repaint work.
How a Roller Tray Works
The tray’s ribbed slope is not just a convenient surface to roll on. It’s the mechanism that removes excess paint from the cover after each dip. Fill the well just below the base of the slope, never above it. Paint above the slope base floods the ribs and defeats their regulating function.
On a single-room job, a tray typically needs refilling every 15 to 20 minutes. That frequency is manageable. On a multi-room job or a ceiling, the constant refilling and repositioning adds up.
How a 5-Gallon Bucket and Grid Work
A bucket grid performs the same mechanical function as the tray slope. The roller dips into the paint, then rolls up the grid to shed the excess. The grid’s wire or plastic bars act as the regulating surface. Reload frequency drops to every 45 to 60 minutes on large walls, which keeps production moving without interruption.
Buckets also sit flat on a step ladder without tipping. That’s not a minor point on ceiling work, where a tipped tray means cleaning the floor before continuing.
Setup Comparison at a Glance
| Setup | Meilleur pour | Reload Frequency | Pole-Compatible? |
|---|---|---|---|
| Roller tray | Single room, up to ~200 sq ft | Every 15–20 min | Oui |
| 5-gallon bucket + grid | Large walls, ceilings, multi-room | Every 45–60 min | Oui |
ROLLINGDOG roller trays and paint buckets are available for both setups, including grid inserts sized for 9-inch and 18-inch roller frames.
Why New Roller Covers Need Conditioning Before the First Load
Dry synthetic nap fibers repel the first application of latex paint, causing uneven initial saturation and loose-fiber shedding into the wet finish. Dampening the cover with water before the first dip lets paint load through to the roller core consistently from the first pass. Wooster Brush specifically recommends conditioning for water-based paints, using water only.
The Lint Test
Press a length of painter’s tape along the full nap surface before conditioning. Pull it off and check the tape. Fibers stuck to the tape mean the cover needs conditioning before use. A clean tape pull on a used cover means the fibers have already bonded through previous use.
Conditioning Method by Paint Type
For latex and water-based paints, dampen the cover with clean water. For oil-based paints and primers, use mineral spirits instead. “Damp” means lightly moistened throughout, not soaked. A soaked cover dilutes the first coat and extends dry time.
After dampening, roll the cover on a piece of cardboard for 10 to 15 strokes. This removes residual loose fibers and pre-primes the nap fabric so paint can seat evenly from the first tray pass.
Skipping conditioning shows up within the first 2 to 3 strokes on the wall. Fiber clusters appear in the wet paint surface, and the first section of the wall shows thinner, patchier coverage than every section that follows once the cover self-conditions mid-job.
ROLLINGDOG’s covers are designed for consistent saturation from the first pass. That doesn’t change the conditioning step, though. Dry fibers resist paint regardless of how the cover was made — conditioning addresses the fiber state, not the brand.
For more on how nap construction affects saturation speed and coverage, see how nap fiber material affects paint absorption.
The Loading Sequence, Step by Step
A dry roller cover typically requires 5 to 6 passes on the tray slope before paint saturates through to the core. After initial saturation, each reload takes 2 to 3 passes. Wooster Brush describes this as loading with “several quick forward strokes” until the cover is completely saturated but not dripping. Rushing it produces a cover loaded only at the surface, which runs dry within 2 strokes and creates uneven deposits that most painters blame on the paint itself.
- Fill the tray well just below the base of the ribbed slope, not above it. For a bucket, add paint to one-third of bucket capacity.
- Place the roller in the well. Contact only the lower half of the nap. Do not submerge the full cover.
- Lift the roller and roll up the slope with forward strokes. Let the roller’s own weight provide the pressure. Pressing hard compresses nap fibers and defeats the slope’s regulating function.
- Repeat 5 to 6 times for the first load, 2 to 3 times for each subsequent reload.
- Lift the roller horizontally and check for end-drips before going to the wall. (The drip test is covered in detail in the next section.)
The right frame and nap for the surface matters before any of this. See roller frame and nap selection before loading for a surface-by-surface breakdown.
How to Read the Load Before Going to the Wall
A correctly loaded cover feels noticeably heavier than an empty one, shows uniform dark saturation across the nap with no dry channels, and produces no drip from the ends when lifted horizontally from the slope. Missing any one of these: end-drip means overloaded, dry patches or no weight change means starved. The three checks take about five seconds combined and catch most loading errors before they reach the wall.
Weight and visual checks
Lift the roller frame before loading and after. A correctly saturated 9-inch cover is measurably heavier. Experienced painters develop this comparison instinctively; less experienced ones need to consciously build the reference point by feeling both states back to back.
After loading, hold the roller at arm’s length under room light and scan the nap from end to end. The entire surface should show consistent dark saturation with no lighter patches or dry channels. Lighter areas across the width mean insufficient loading, regardless of how many slope passes you ran.
The drip test and sound cue
Lift the roller horizontally after removing it from the slope and hold it still for three seconds. Drips from either end means overloaded. No weight increase means starved. A correctly loaded cover holds without dripping.
The first stroke confirms it. A correctly loaded cover releases with a soft, slightly wet sound on contact. Audible scratching or resistance means the cover is starved regardless of what the visual check showed. When the two conflict, trust the sound.
ROLLINGDOG roller covers are manufactured with nap pile recovery specifications that affect how quickly fibers spring back to full height after each stroke. A cover past its usable life shows compression-induced flat spots that no amount of correct loading can compensate for. If the drip test and weight check pass but the finish still shows dry channels, the cover itself is the variable to replace.

Most loading errors produce recognizable finish symptoms. See how loading errors cause paint streaks on walls for a diagnosis guide organized by symptom type.
When to Reload Mid-Job Without Breaking the Wet Edge
Reload when the roller starts to drag against the wall surface or produces visible dry streaks in the stroke, not at a fixed count of strokes. Extending a load past this point forces extra wall pressure, which compresses nap fibers and stretches the wet section too thin. The wet edge dries faster when the roller is starved, which means wet-edge repairs are more likely the longer the reload is delayed.
Reading the Drag Signal
Sound changes before visual streaks appear. When resistance increases on the upstroke, the cover is approaching the reload threshold. Waiting for dry streaks to appear in the finish means the cover has already been starved for several strokes.
Wet Edge Protocol During Reload
Leave the last 2 to 3 inches of the current section untouched when heading to the tray or bucket. Reload, then complete those inches before starting the adjacent strip. This keeps the wet edge workable and prevents the seam between strips from showing in the cured finish.
The One-More-Section Trap
Forcing extra coverage from a depleted roller saves maybe 90 seconds at the tray. The wet-edge repair it causes costs 10 to 20 minutes of re-rolling and feathering after the fact. Professional painters treat the reload as part of the stroke count, not an interruption to it.
For a full breakdown of how the W-pattern and wet edge interact during application, see how the W-pattern and wet edge work together.
Five Loading Mistakes and the Finish Problem Each Causes
Five specific loading mistakes each leave a different fingerprint in the cured finish. Full submersion, skipped slope rollout, rushed initial saturation, overextended reloads, and cold or thick paint. The last one is the least obvious: the cover looks correctly loaded but releases poorly against the wall, because viscosity and temperature affect how paint transfers from nap to surface, not just how it loads.
| Loading Mistake | Finish Symptom |
|---|---|
| Full submersion of roller in paint well | Dark patches at stroke starts; core paint back-bleeds during application |
| Skipping slope rollout after dipping | Drips on vertical surfaces; heavy paint buildup at section starts |
| Rushing initial saturation (under 5 passes) | Cover runs dry within 2 strokes; uneven deposit across section width |
| Overextending between reloads | Drag marks; lap marks from stretched wet edge |
| Cold or thick paint (below 65°F / high viscosity) | Cover looks loaded correctly but releases poorly; “holidays” (missed spots) visible under raking light |
Cold paint is the least-obvious mistake. The fix is not to thin the paint, because thinning changes the coverage rate and can affect adhesion. Most latex paints perform best between 50 and 90°F, according to Behr Pro. Bring paint to around 65 to 75°F before starting and keep it there throughout the job.
When paint has saturated deep into the core after a long session, proper cleaning prevents fiber damage on the next use. See cleaning a roller cover when paint has saturated into the core for the full process.
Questions fréquemment posées
How many times should I roll the roller on the tray to load it?
A dry roller cover typically needs 5 to 6 passes on the tray slope before going to the wall. After that, each reload takes 2 to 3 passes. Wooster Brush describes the process as “several quick forward strokes” until the cover is completely saturated but not dripping. The first load always takes longer because dry nap fibers need to wet all the way through to the roller core. Rushing it produces a cover that fails within 2 strokes.
How do I stop my roller from dripping?
Dripping means the cover is overloaded. After dipping, roll on the slope until no paint drips from the roller ends before going to the wall. Never start the first stroke at a corner or edge with a freshly loaded roller. Begin 6 inches in from the corner and work toward it on that first pass to avoid deposit buildup at edges.
Can I use a 5-gallon bucket instead of a roller tray?
Yes. A 5-gallon bucket with a metal or plastic grid insert functions identically to a tray slope. The grid removes excess paint from the cover the same way the tray ramp does. Buckets hold more paint, require fewer refills, and are more stable on a ladder. Those advantages outweigh the tray on any job covering more than 200 square feet.
Why is my roller splattering paint?
Splattering indicates overloading or excessive application speed. Roll off the excess on the slope until no drips remain before going to the wall. Slow the stroke speed slightly, since fast rolling creates centrifugal force that throws paint off the nap. If splattering continues after correcting the load, check whether the nap is shedding fibers, which signals a cover past its usable life.
Key takeaways:
- A dry roller cover needs 5 to 6 passes before it’s ready. Rushing produces a starved cover that fails within 2 strokes.
- Read the load by weight, visual saturation, and the drip test, not by counting dips.
- Reload by signal (drag sound, dry streaks), not by stroke interval. A timely reload costs less than a wet-edge repair.
Roller covers, frames, and trays for production-volume painting work are available through ROLLINGDOG’s wholesale channel. Download the product catalogue or browse the paint roller range.
Written by the ROLLINGDOG product and application team — professional painting tools engineers and field trainers with combined experience across residential, commercial, and industrial coating projects.