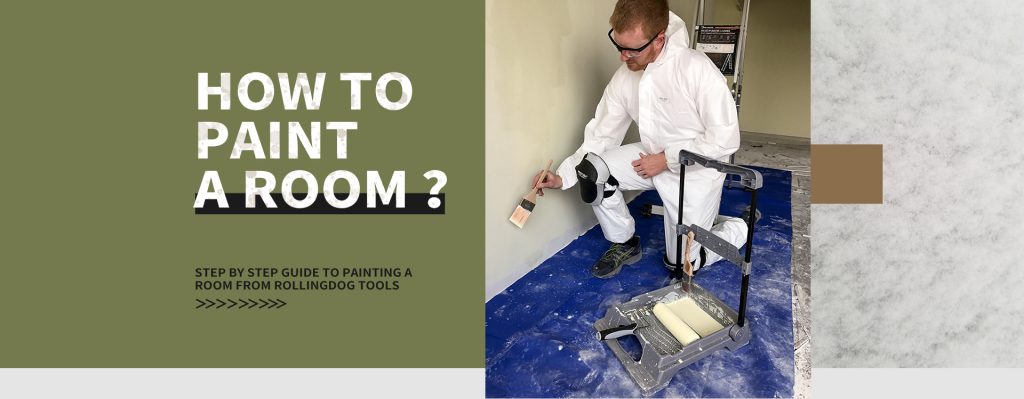
STEP 1:
SELECTING YOUR TOOLS
For surface protection drop cloths and tape are recommended. Masking tape, blue painters tape, and a variety of Washi tapes can be used with painting jobs. Pre-taped drop sheets like ROLLINGDOG #80348 and #80350 work great for taping up sheets of plastic or paper film over trim, floors and furniture etc. Drop cloths are needed to cover floors, stairs and larger furniture that cannot be removed from area. They come in thin plastic, multi layer composite material, thick paper or canvas. Drop cloths like ROLLINGDOG’s Blue Defender™ and Canvas-Guard™ are reusable and offer the best protection.
A 2 1/2” (63mm) angled sash brush like ROLLINGDOG #10241 or #10180 is recommended for painting the areas around trim and wall and ceiling corners where the roller cannot paint, referred to as “cutting in”. Natural bristles are best for painting with oil based paints and synthetic filament brushes are best for water based paints. For inexperienced painters it is best to tape and cover all trim and edges to get the best lines before cutting in.
A heavy duty paint tray or bucket with loading grid will be needed to dip and load your roller, it also helps to have a handy paint cup for cutting in.
A 9” roller cover made of synthetic fibers like ROLLINGDOG’s Smooth-Pro™ or Super-Micro™ are the best choice when using latex or water based paint. With oil based paint natural fiber like ROLLINGDOG’s Wooly-Pro™ or mohair covers are best. Nap length refers to the length of hairs on the roller cover. Shorter naps are for smooth surfaces and will leave a higher sheen, or shinier paint finish, longer naps are for rough surfaces and will leave a more flat or dull paint finish. For most interior walls a 3/8” (10mm) nap is suggested, for smooth to semi smooth walls like drywall.
It is also important to get a quality roller frame that holds covers on well. Be sure to check which style rollers are used in your area (cage frame or single rod style). This will not only affect the roller covers used but also the extension pole connection style used (threaded or tapered end). An extension pole may not be necessary for a room with standard height ceilings, but is recommended as it will make rolling the wall easier and faster.

STEP 2:
ROOM PREPARATION AND CUTTING IN
Move all furniture out of the room or to the center, if cannot be removed from area cover with drop cloth.For small rooms cover whole floor with drop cloth if possible.
Make sure to have drop cloth covering floor at least 3 feet out from wall being painted in larger rooms.
Remove hardware from walls (door hinges, electrical outlets, electrical switch covers, smoke detectors, etc). Tape around all edges and trimMake sure walls are clean and free of dust, spider webs etc.
Priming is necessary if you are painting over any non-paint surface such as drywall, unpainted wood, metal, spackle, putty, or even walls with marks from ink, crayons, or mold stains. If the previous coating was oil based and you are using water based even though it is a pre painted surface this will also need to be primed.
Do your cutting in first. Since rollers cannot get to tight edges, it is recommended to be use a 2.5” brush to paint along the ceiling, inside corners, moldings, trim, and around outlets and light switches. Mini rollers are also becoming a more popular method for cutting in.Be sure to mix your paint or primer thoroughly with a stir bar, and then add it to a small tray or cup.
ROLLINGDOG paint cups like #20009 work with mini rollers and brushes, designed for ergonomic carry and effective brush and mini roller loading. You may also just use a plastic throw away cup as you go around the room cutting in with brush.

STEP 3:
ROOM PREPARATION AND CUTTING IN
Painting with roller: Put your roller cover on the cage. Stir your paint thoroughly, and pour about ½ and inch into the tray’s well.Dampen the roller cover: Prepping your roller ensures faster painting — and saves paint.
For latex paint, dampen your roller cover with water from your spray bottle or the faucet. For oil-based paints, roll the alkyd-appropriate roller cover in the tray of paint thinner.
Scrape off excess moisture with your 5-in-1 tool.Roll the roller down into the paint tray.Roll down the slope of the rake in to the paint well. Properly loading the roller cuts down on spatter and drips and improves coverage.

ROLLER PAINTING TECHNIQUE
Hold the roller properly to improve your control: Hold it in your dominant hand. Stand with your feet shoulder-width apart and your roller directly in front of you. If you’re using an extension pole, place your dominant hand toward the bottom for control and your non-dominant hand at the middle position for leverage and pressure.
Paint a diagonal upward stroke.Use a long, slow, upward diagonal stroke to unload the first part of the “M” pattern.
Make a diagonal downward stroke.In a continuing motion, follow the first upward stroke with a long, slow stroke downward at a diagonal.

Continue by finishing the “M” pattern.
In a continuing motion, use another long, slow, upward diagonal stroke and another long, slow downward diagonal stroke to finish the “M” pattern.Cross the “M” with horizontal strokes.
Paint a series of horizontal strokes working from the bottom of the “M” to the top.
Smooth out the section.
Smooth the section by making a series of downward strokes from top to bottom.
Repeat steps to complete the wall.
Repeat the process of loading and painting. Working in small sections, move from dry areas to wet ones, overlapping the wet edge each time.

CLEAN UP
Remove tape from walls.
Reinstall hardware.
Clean brushes/rollers/trays immediately after job completion to ensure long life of tools.
When you are sure paint is completely dry remove drop cloths and drop sheets and replace furniture.


